Trọn bộ Video Dạy Revit của đài truyền hình HTV4

vnrevit - Đây là toàn bộ Video dạy Revit của Tiến sĩ Lê Hùng Tiến, do đài truyền hình Thành phố HTV4 thực hiện, toàn bộ bằng Link Mediafire, gồm tất cả là 50 bài chia làm 25 Link Download.

Trọn bộ Video Dạy Revit của đài truyền hình HTV4
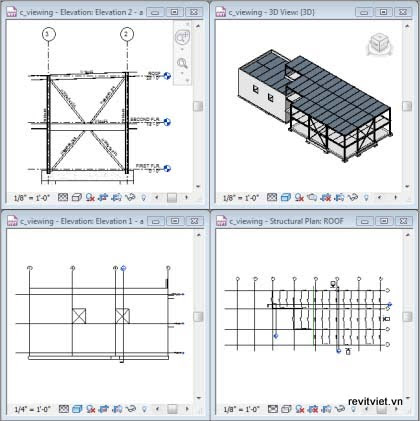
Ảnh chụp từ màn hình vi tính

Bài 1+2 : http://www.mediafire.com/download.php?awijow1xv0n
Bài 3+4 : http://www.mediafire.com/download.php?ifztnylqgwz
Bài 5+6 :http://www.mediafire.com/download.php?ghxz33jezzm
Bài 7+8 : http://www.mediafire.com/?ha0mizinjz1
Bài 9+10 : http://www.mediafire.com/download.php?mjzmm2zomym
Bài 13+14 : http://www.mediafire.com/download.php?dtzznzmm3io
Bài 15 + 16 : http://www.mediafire.com/download.php?yinlwwym53z
Bài 17 + 18 : http://www.mediafire.com/download.php?nzwnzdwy43k
Bài 19 + 20 : http://www.mediafire.com/download.php?zwjjlnnzmmm
Bài 21 + 22 : http://www.mediafire.com/download.php?te3yem3ozwj
Bài 23 + 24 : http://www.mediafire.com/?almmmknmyh2
Bài 25 + 26 : http://www.mediafire.com/?ak0mzzyymio
Bài 27 + 28 : http://www.mediafire.com/?mizyfmymijj
Bài 29 + 30 : http://www.mediafire.com/?mgjgnlwzmho
Bài 31 + 32 : http://www.mediafire.com/?mtnzmimmiiz
Bài 33 + 34 : http://www.mediafire.com/?qildj2wjmnh
Bài 35 + 36 : http://www.mediafire.com/?jwyifzmdryg
Bài 37 + 38 : http://www.mediafire.com/?vninniyzmqz
Bài 39 + 40 : http://www.mediafire.com/?r0mxzmeu2zm
Bài 41 + 42 : http://www.mediafire.com/?yjnzxklvdtw
Bài 43 + 44 : http://www.mediafire.com/?qyzmyhmifan
Bài 45 + 46 : http://www.mediafire.com/?zmaommx35n5
Bài 47 + 48 : http://www.mediafire.com/?zwjwdy0owey
Bài 49 + 50 : http://www.mediafire.com/?dzmtimwliyo


>> Đọc thêm...

Giới thiệu Revit MEP 2013

Dạy Revit - Học Revit

vnrevit - Nền Revit MEP dành cho việc lập mô hình thông tin xây dựng là một thiết kế và hệ thống dẫn chứng bằng tài liệu hổ trợ thiết kế, những bản vẽ và những bản liệt kê ( schedules ) theo yêu cầu dự án xây dựng. Việc lập mô hình xây dựng ( Building Ifnormation Modeling -BIM ) phân phối thuộc tính về thiết kế dự án, phạm vi, chi tiết thiết kế thi công, và những giai đoạn thực hiện. trong mô hình Revit MEP, mỗi tờ bản vẽ, phối cảnh 2D và 3D, bản liệt kê, Revit MEP sẽ thu nhập thông tin về dự án xây dựng và sắp xếp thông tin này ngang qua tất cả các nội dung trình bầy khác của dự án. Khi thay đổi thông số, Revit MEP sẽ tự động sắp xếp những thay đổi dc thực hiện ở bất cứ nơi nào- trong các phối cảnh mô hình, những tờ bản vẽ, những bản liệt kê, những mặt cắt và sơ đồ.
Revit MEP về phương thức hoạt động và giao diện giống những phần mềm Revit khác. Điểm khác nhau cơ bản đó là lĩnh vực thiết kế. Revit Building nghiêng về lĩnh vực thiết kế xây dựng cơ bản, hiệu chỉnh và bổ sung các phần tử cần thiết trong dự án, trang trí nội thất và xuất phim.

Revit MEP thiên về những lĩnh vực mà revit còn bỏ trống nhưng không thể thiếu được trong 1 công trình xây dựng, đó là: điện và cơ khí ...

Đến với Revit MEP người thiết kế trợ giúp xây dựng:
  • Hệ thống điện cung cấp và chiếu sáng
Thiết kế các phần tử mạch điện
Revit MEP cập nhật dữ liệu và thông tin như thế nào ??

Đặc điểm cơ bản của ứng dụng lập mô hình thông tin xây dựng là khả năng kết hợp những thay đổi và duy trì tính nhất quán vào mọi lúc. Bạn không cần phải can thiệp để cập nhật những bản vẽ hoặc những liên kết. Khi thay đổi điều gì đó, Revit MEP ngay lập tức xắc định điều gì chiệu tác động bởi sự thay đổi ấy và phản ánh thay đổi đó vào bất kỳ những phần tử bào chiệu tác động. Revit MEP sử dụng 2 khái niệm chính yếu làm cho nó trở nên đầy quyền năng đặc biệt và sử dụng dễ dàng. Đầu tiên là việc giành được những mối quan hệ trong khi nhà thiết kế làm việc.

Thứ hai là phương pháp truyền những thay đổi trong xây dựng. Kết quả của những khái niệm này là: Phần mềm hoạt động giống như bạn thực hiện, không yêu cầu nhập dữ liệu không quan trọng đối với thiết kế. Revit MEP sử dụng năm hạng phần tử : Host, Component, annotation, View, và datum.
  • Hosts : Gồm những phần tử như sàn nhà, mái và trần nhà
  • Components: Gồm có cửa sổ, cửa ra vào và các vật dụng khác.
  • Annotations: Quan sát dưới dạng 2D theo hướng chỉ định. ( view-specific).
  • Views: là những hướng quan sát động của mô hình và luôn cập nhật.
  • Datums: là những phần tử tham chiếu giúp bạn kết hợp công trình xây dựng lại với nhau. Những phần tử Revit MEP được thiết kế do bạn tạo và hiệu chỉnh trực tiếp không cần lập trình.
  • Projest ( dự án ): Trong Revit MEP, dự án là cơ sở dữ liệu thông tin đơn lẻ liên quan đến mô hình thông tin xây dựng. File dự án chứa tất cả thông tin dành cho thiết kế xây dựng, từ hình học đến dữ liệu xây dựng. Thông tin này bao gồm những thành phần được dùng để thiết kế mô hình, những phối cảnh của dự án và những bản vẽ của thiết kế.
  • Level : ( mặt phẳng ): là những mặt phẳn nằm ngang vô hạn, hoạt động như một tham chiếu cho những phần tử như mái nhà. sàn và trần.
  • Element (phần tử): khi tạo dự án, bạn bổ sung những phần tử xây dựng thông số Revit MEP vào thiết kế. Revit MEP phân loại những phần tử theo kiểu thành phần ( model component) và những lời chú thích ( annotations).
  • Family: là những nhóm phần tử trong cùng chủng loại ( category) nhằm tập hợp những phần tử theo thông số ( những đặc tính ), công dụng giống nhau. những phần tử khác nhau trong 1 family có thể có những giá trị khác nhau đối với một số hoặc tất cả các đặc tính, nhưng tập hợp những đặc tính ấy - tên và ý nghĩa của chúng - thì giống nhau. Families có thể là những component families hoặc system families:
  • Những files component family có thể được nạp vào 1 dự án và được tạo ra những family templates.
  • System families: bao gồm những bức tường, các chiều, trần nhà, mái nhà, những mặt phẳng và không thể dùng để nạp và tạo những file riêng biệt.
  • Revit MEP xắc định sẵn những tập hợp những đặc tính và sự miêu tả đồ họa của các System families.
  • Bạn có thể sử dụng những loại được xắc định sẵn để phát sinh những loại mới thuộc về family trong phạm vi dự án.
  • System families có thể chuyển động qua lại giửa các dự án
Type: Mổi femily có thể có những loại khác nhau. Một Type có thể là một kích cỡ cụ thể của một Family, chẳng hạn như một khối tiêu đề ( title block ) Ao hoặc một cữa ra vào 910x2110. Một Family có thể có nhiều Type. VD: một cái bàn có thể có nhiều kích cỡ khác nhau. mổi kich cỡ khác nhau sẽ là một loại Type trong cùng một Family.

Insttannce : Là những hạng mục được thiết lập trong dự án và có những vị trí cụ thể trong tòa nhà hoặc trên bản vẽ.
Nguồn trích dẫn: benhvientinhoc.com

Link download phần mềm Revit MEP 2013 full


Khi down về xong các bạn giải nén vào 1 thư mục trong máy, rồi tiến hành cài đặt bình thường như các phiên bản cũ.


Hoặc các bạn có thể down Link trực tiếp trên trang Autodesk bên dưới, rồi sau đó bẻ crack theo file bộ Crack Full mà mình đã Post

http://trial.autodesk.com/SWDLDDLM/2013/RVT/ESD/Autodesk_Revit_2013_English_Win_32-64bit.exe
http://trial.autodesk.com/SWDLDDLM/2013/REVIT/ESD/Autodesk_Revit_Architecture_2013_English_Win_32-64bit.exe

Nguồn vnrevit
>> Đọc thêm...

Bài học: Làm việc với Text và Tags

This lesson describes how to work with text and tags. You begin the lesson by learning about text and tags. Then, you learn the process of adding text and the steps to set text placement parameters. You also learn about some recommended practices for working with text and tags. The lesson concludes with an exercise on adding column and beam tags to a structural framing design.


>> Đọc thêm...

Bài học: Thêm kích thước

This lesson describes how to add dimensions and spot dimension symbols to a project. You begin the lesson by learning about temporary dimensions, permanent dimensions, and spot dimension symbols. Next, you learn about some recommended practices for working with dimensions and spot dimension symbols. The lesson concludes with an exercise on adding dimensions and spot symbols.


>> Đọc thêm...

Chương 10: Tạo chú thích và bảng thống kê

Revit provides tools to quickly annotate a structural model. You use annotations to document a design and transform concept designs into construction document sets.


>> Đọc thêm...

Bài học: Tạo dốc thoải

This lesson describes how to create various types of ramps. You begin the lesson by learning about ramps and the process of creating them. Next, you learn some recommended practices for creating ramps. The lesson concludes with an exercise on creating a ramp and modifying the railing.


>> Đọc thêm...

Bài học: Tạo cầu thang

This lesson describes how to create stairs. You begin the lesson by learning about stairs and railings. Then, you learn the steps and some recommended practices for creating stairs. The lesson concludes with an exercise on creating U-shaped and monolithic stairs.


>> Đọc thêm...

Chương 9: Cầu thang và dốc thoải

Revit provides tools for quickly modeling stairs, ramps, and their associated railings. In this chapter, you learn more about developing your building model by including stairs and openings for the stairs. You also learn how to create various types of ramps and associated railings in a structural model. Chapter Objectives


>> Đọc thêm...

Bài học: Thêm móng công trình

This lesson describes how to add foundations to a structural model. You begin the lesson by learning about foundations and the steps to create stepped walls and foundations. Then, you learn about some recommended practices for adding foundations. The lesson concludes with exercises on adding foundations and creating an elevator pit.


>> Đọc thêm...

Chương 8: Tạo móng công trình


>> Đọc thêm...

Bài học: Tạo mái và thêm khung kết cấu

This lesson describes how to create a roof and add structural framing to the roof for support. You begin the lesson by learning about roofs. Next, you learn the process of sketching roofs. Then, you learn some recommended practices for creating roofs. The lesson concludes with an exercise on creating a sloped roof with steel framing.


>> Đọc thêm...

Bài học: Thêm sàn

This lesson describes how to add floors in structural models. You begin the lesson by learning about floor elements and the process of adding a floor element. Next, you learn the steps to create sloped floors and a shaft opening in a floor. You also learn about some recommended practices for adding floors. The lesson concludes with an exercise on adding and modifying floor elements.


>> Đọc thêm...

Chương 7: Tạo sàn và mái

In Revit, floors and roofs are systems families. These structural systems are 3D parametric elements that you create and add directly to a structural model and customize to any project specification as required.


>> Đọc thêm...

Lesson: Working with Concrete Beams

This lesson describes how to work with concrete beams. You begin the lesson by learning about concrete beams and options to edit concrete beam joins. Next, you learn about vertical justification of beams and some recommended practices for working with concrete beams. The lesson concludes with an exercise on working with concrete beams.


>> Đọc thêm...

Lesson: Working with Structural Steel Frames

This lesson describes how to add and edit structural steel moment and braced frames. You begin the lesson by learning about structural steel frames and how to set steel frame symbols in a plan view. Next, you learn the process of adding bracing members, the steps to edit braces, and some recommended practices for working with structural steel frames. The lesson concludes with an exercise on working with structural frames.


>> Đọc thêm...

Lesson: Adding Floor Framing

This lesson describes how to add floor framing to a structural model by using beams. You begin the lesson by learning about floor framing and beams. Next, you learn the properties of beams, the steps to add openings in beams, and some recommended practices for adding and modifying beams. The lesson concludes with an exercise on adding floor framing to a structural model.


>> Đọc thêm...

Chương 6: Tạo kết cấu khung

>> Đọc thêm...

Lesson: Working with Structural Walls

This lesson describes how to work with structural walls. You begin the lesson by learning about structural walls, structural wall parameters, and pilasters. Next, you learn the steps to create wall openings and some recommended practices for working with structural walls. The lesson concludes with exercises on creating structural wall types and structural walls with openings, and creating and modifying pilasters.


Structural walls are an integral part of the structural model. They transfer gravity and lateral loads to foundations.
>> Đọc thêm...

Lesson: Working with Structural Columns

This lesson describes how to work with structural columns. You begin the lesson by learning about structural columns. Next, you learn the steps to load and create different types of structural columns. You also learn about the tools and options for placing structural columns. In addition, you learn how to create openings in structural columns and some recommended practices for working with structural columns. The lesson concludes with an exercise on adding and modifying structural columns.


>> Đọc thêm...

Chương 5: Tạo cột kết cấu và tường kết cấu

>> Đọc thêm...

Lesson: Creating and Modifying Grids

This lesson describes how to create and modify grids. You begin the lesson by learning about grids and the methods of creating and modifying grid lines. Next, you learn about some recommended practices for creating and modifying grids. The lesson concludes with an exercise on creating and modifying grids.


>> Đọc thêm...

Lesson: Adding and Modifying Levels

This lesson describes how to add and modify levels in a structural model. You begin the lesson by learning about levels. Next, you learn the steps and some recommended practices for adding and modifying levels. The lesson concludes with an exercise on adding levels.


>> Đọc thêm...

Bài học: Bắt đầu một dự án

This lesson describes how to set up a project and transfer standards between projects. You begin the lesson by learning about projects. Next, you learn the steps to create project templates and some recommended practices to create project template files. The lesson concludes with an exercise on setting up a project and transferring project standards.


>> Đọc thêm...

Chương 4: Bắt đầu một dự án

>> Đọc thêm...

Bài học: Làm việc với khung nhìn 3D

This lesson describes how to work with 3D views. You begin the lesson by learning about 3D views and cameras and how to navigate through a 3D view. Next, you learn the steps to create and modify camera views and change the material properties of elements in a 3D view. You also learn about some recommended practices for working with 3D views. The lesson concludes with an exercise on working with 3D views.


>> Đọc thêm...

Bài học: Làm việc với khung nhìn mặt đứng và mặt cắt

This lesson describes how to work with elevation and section views. You begin the lesson by learning about the elevation and section views. Next, you learn the steps to control the visibility of elevation and section tags. You also learn some recommended practices for creating the elevation and section views. The lesson concludes with an exercise on working with the elevation and section views.


>> Đọc thêm...

Exercise: Control Object Visibility

In this exercise, you control the visibility and graphical representation of objects in a view.

You want to emphasize the framing members and de-emphasize the floor slabs and foundations in an  elevation view. You then want to apply the view settings to another elevation view.


>> Đọc thêm...

Guidelines for Controlling Object Visibility

The following recommended practices help you to control the visibility and appearance of the objects in a structural model.

+ While using the Visibility/Graphic Overrides dialog box, move the dialog box to one side so that you can see most of the view window.


>> Đọc thêm...

Using Filters

You use filters to override the graphic display and visibility of objects based on specific criteria and common properties of elements in a view. After creating the filter, you apply it to a plan view.


>> Đọc thêm...

Modifying Line Styles

You use the Visibility/Graphic Overrides dialog box to modify the line styles for an object category in a structural model view by changing the graphic display properties of the category. When you modify line style, you can change the weight, color, and pattern of lines. You can change default line styles for all views of the structural model by using the Line Styles dialog box, which you can access from the Settings drop-down on the Project Settings panel of the Manage tab. You can also change line styles that are applied to objects in all views by using the Object Styles dialog box.


>> Đọc thêm...

View Templates

View templates contain the standard settings of a view. Revit has default view templates that you can
apply to views, and you can also create your own view templates for specific view conditions. The following illustration shows the View Templates dialog box, which you access by selecting View Template Settings from the View Templates drop-down on the Graphics panel of the View tab.
 
>> Đọc thêm...

About Controlling Object Visibility

You control the visibility of objects to display, hide, or modify the appearance of specific objects in a selected view. You control object visibility and graphical representation in all the views of a project by defining object styles. You use the Visibility/Graphic Overrides dialog box to set object visibility and graphical representation differently for each view.


>> Đọc thêm...

Bài học: Điều chỉnh hiển thị đối tượng

Bài học này mô tả làm thế nào để điều chỉnh hiển thị và đại diện đồ họa của những đối tượng trong mô hình kết cấu. Bạn bắt đầu bài học bằng cách học về điều chỉnh hiển thị đối tường và đại diện đồ họa bằng cách dùng hộp thoại Visibility/Graphic Overrides và tùy chọn sẵn khung nhìn. Sau đó, bạn học chỉnh sửa những kiểu đường thẳng để điều chỉnh hiển thị và sử dụng bộ lọc. Tiếp theo, bạn học một vài bài thực hành đề xuất để điều chỉnh hiển thị đối tượng. Bài học kết thúc với một bài tập về điều chỉnh hiển thị đối tượng.
Có những lúc bạn cần điều chỉnh hiển thị và đại diện đồ họa của một phẩn từ trong khung nhìn nào đó mà không ảnh hường đến toàn bộ mô hình. Ví dụ như bạn có thể không muốn kí hiệu cao độ hiển thị trong khung nhìn mặt bằng kết cấu. Tuy nhiên, nếu bạn chọn và xóa những kí hiệu này thì khung nhìn mặt đứng cũng sẽ được xóa. Thay vào đó bạn có thể điều chỉnh hiển thị đè lên khung nhìn để không hiển thị kí hiệu cao độ.

Kí hiệu cao độ hiển thị
Kí hiệu cao độ không hiển thị
Mục tiêu
Sau khi hoàn thành bài học này, bạn sẽ có thể:
Mô tả điều chỉnh hiển thị đối tượng và đại diện đồ họa.
  • Identify view template options.
  • Modify line styles to control object visibility.
  • Use filters.
  • State the recommended practices for controlling object visibility.
  • Control object visibility.
>> Đọc thêm...

Bài tập: Khám phá và tạo khung nhìn

Trong bài học này, bạn khám phá những khung nhìn khác nhau của một mô hình kết cấu. Thêm vào đó, bạn tạo nhiều khung nhìn mặt bằng bằng cách sử dụng khung nhìn hiện hữu trong cửa sổ Project Browser.
Bạn muốn khám phá và tạo những khung nhìn mô hình kết cấu vì vậy bạn có thể hình dung một cách đúng đắn thiết kế kiến truc. Bạn dùng Steering Wheel để quan sát mô hình kết cấu và sau đó khám phá những khung nhìn khác nhau trong cửa sổ Project Browser. Cuối cùng bạn tạo những khung nhìn mặt bằng nhiều lớp của mô hình kiến trúc bằng cách dùng tùy chọn cho việc nhân đôi khung nhìn.


>> Đọc thêm...

Guidelines for Working with Views

Những thực hành đề xuất dưới đây giúp bạn làm việc một cách hiệu quả với khung nhìn mô hình.


>> Đọc thêm...

Những thuộc tính của khung nhìn mô hình

You use view properties to set and modify parameters associated with the active view, such as scale, graphics style, and underlay. Certain view instance properties are available on the View Control Bar at the bottom of each view window. You can use this bar to quickly access some of the properties that affect the views in the view window


>> Đọc thêm...

Khung nhìn mô hình

Cửa sổ Project Browser hiển thị một danh sách tất cả khung nhìn dự án. Những khung nhìn này hiển thị đại diện khác nhau của cùng một mô hình kiến trúc. Khi bạn mở một khung nhìn mới, khung nhìn mà bạn đã mở vẫn tồn tại và những thiết lập của chúng không thay đổi.


>> Đọc thêm...

Bài học: Làm việc với khung nhìn

Bài học này mô tả làm thế nào để sử dụng những khung nhìn khác nhau được liệt kê trong Project Browser. Bạn bắt đầu bài học bằng cách học về khung nhìn và cách sử dụng những thuộc tính của nó. Sau đó bạn làm một số bài tập đề xuất để làm việc với khung nhìn. Bài học kết thúc với một bài tập về tìm hiểu khung nhìn hiện hữu và tạo ra một khung nhìn mới.
khung nhin mo hinh

>> Đọc thêm...

Chương 3: Khung nhìn mô hình kết cấu

Trong chương này, bạn sẽ học làm thế nào để tạo, copy và quản lí khung nhìn. Thêm vào đó, bạn học làm thế nào để điều khiển đối tượng hiển thị trong khung nhìn và tạo mặt chiếu đứng, mặt cắt và khung nhìn 3D.


>> Đọc thêm...

Exercise: Work with Structural Elements and Families

In this exercise, you view different types of structural elements, families, and types of families. You also change the parameters of a beam.
In your project, you want to view the different types of structural elements and families in different views.

>> Đọc thêm...

Guidelines for Working with Structural Elements and Families

The following recommended practices help you work efficiently with structural elements and families.


>> Đọc thêm...

About Families

About Families
Families are classes of elements within a category that group elements with a common set of parameters, identical use, and similar graphical representation. Revit contains various predefined families, which you can use in your projects. You can modify these predefined families to suit project requirements. You can also create custom families by using templates for beams, columns, and foundations.
Definition of Families
A family is a collection of objects with similar characteristics. These characteristics are represented by instance and type parameters. Instance parameters are specific to a particular instance of an object in a structural model, but type parameters apply to all objects of a particular type. Different elements within a family may have different values for some or all properties; however, the set of properties is the same. Each element with a different value is a new type within a family. For example, a beam with a specific profile can be of different sizes and all beams of different sizes are new types within the beam family. Similarly, rectangular columns can be considered as one family, though the columns belonging to the family are available in different styles and different sizes within those styles.
The following illustration shows different types of columns belonging to the Structural Columns family.

>> Đọc thêm...

About Structural Elements

A structural model comprises different structural elements, such as beams, columns, walls, and foundations.
Definition of Structural Elements
Structural elements are the fundamental blocks of a building structure. When you place an element in a structural model, the individual element is called an instance of that element type. The instances of an element type have certain common parameter values. Element instances are broadly divided into four categories: datum, model, view, and annotation. The model category is further subdivided into the component and host categories.
The following illustration shows the categories of element instances and some examples of elements included in these categories.

>> Đọc thêm...

Exercise: Explore the Revit Structure User Interface

In this exercise, you explore the different parts of the user interface.
Your firm is standardizing on Revit Structure. You need to learn the user interface before you start work on a project.
You do the following:
  • Explore views of a model.
  • Explore model properties using the interface.
The completed exercise
>> Đọc thêm...

Guidelines for Using the User Interface

User interface elements such as the ribbon, Options Bar, and Project Browser help you to work efficiently. The following guidelines help you to work with the user interface.


>> Đọc thêm...

The Ribbon Framework

The Ribbon Framework
The ribbon is displayed at the top of the application window. You use the ribbon to access tools and options that help you design a building project. You can customize the ribbon by changing its view state and by rearranging the panels that contain the tools. You can toggle between the ribbon view states by using the control to the right of the Manage tab.
 The following illustrations show the various ribbon view states.

>> Đọc thêm...
Copyright © 2012-2015 Dạy Revit - Học Revit

Trang chủ | Trung tâm dạy Revit | Outsourcing | Liên hệ | Tác giả | Lên đầu trang